Automatic brooder instructions
Electrical hazards
- Only to be used by experienced person.
- Be sure Power Cord Assembly is not plugged in during installation or cleaning.
- before cleaning, switch off the heat lamp and let it cool down. The heat lamp is
extremely hot when on. In order to avoid injuries/ burns, always install ceramic heat lamp in a position where there is no chance of touching in by accident while attending the chicks.
- Do not use if chords are damaged .
- The brooder parts must be placed in an indoor area not subject to splashes of water or wet
- conditions and protected from or out of reach of animals.
- These parts must not be used, cleaned or maintained by children or persons with reduced
- physical, sensory or mental capabilities or lack of experience and knowledge without
supervision. Children must not play with the brooder..
- Do not plug into broken or damaged sockets.
- Never touch any electrical part if your hands are wet.
- Always switch off the power when adding feed, water, cleaning brooder or adding the chicks.
- Do not use higher wattage bulb or heat lamp.
Setting Cautions.
- This kit is for making a big brooder for housing large number of chicks. Do not use this kit for small brooding box . This can result in overheating and may cause fire.
- Do your research to make a brooder which is safe to use.
- Do not use these parts for adult birds, use brooder for small chicks only. Chicks should be 50 cm away from heat lamp/bulb . Do not leave chicks alone for a long time, keep monitoring at regular intervals.
- Do not cover the brooder with a towel or blanket if temperature is low or if there is a
power loss.
- Switch the brooder on at least 2 hours before the first use so that the area is warmed
and the necessary adjustments to temperature can be made.
- Do not use DIY brooder for rare/ expensive birds.
Warning!
Failure to follow these and other safety precautions could result in electrical shock causing
serious injury, burns or death!
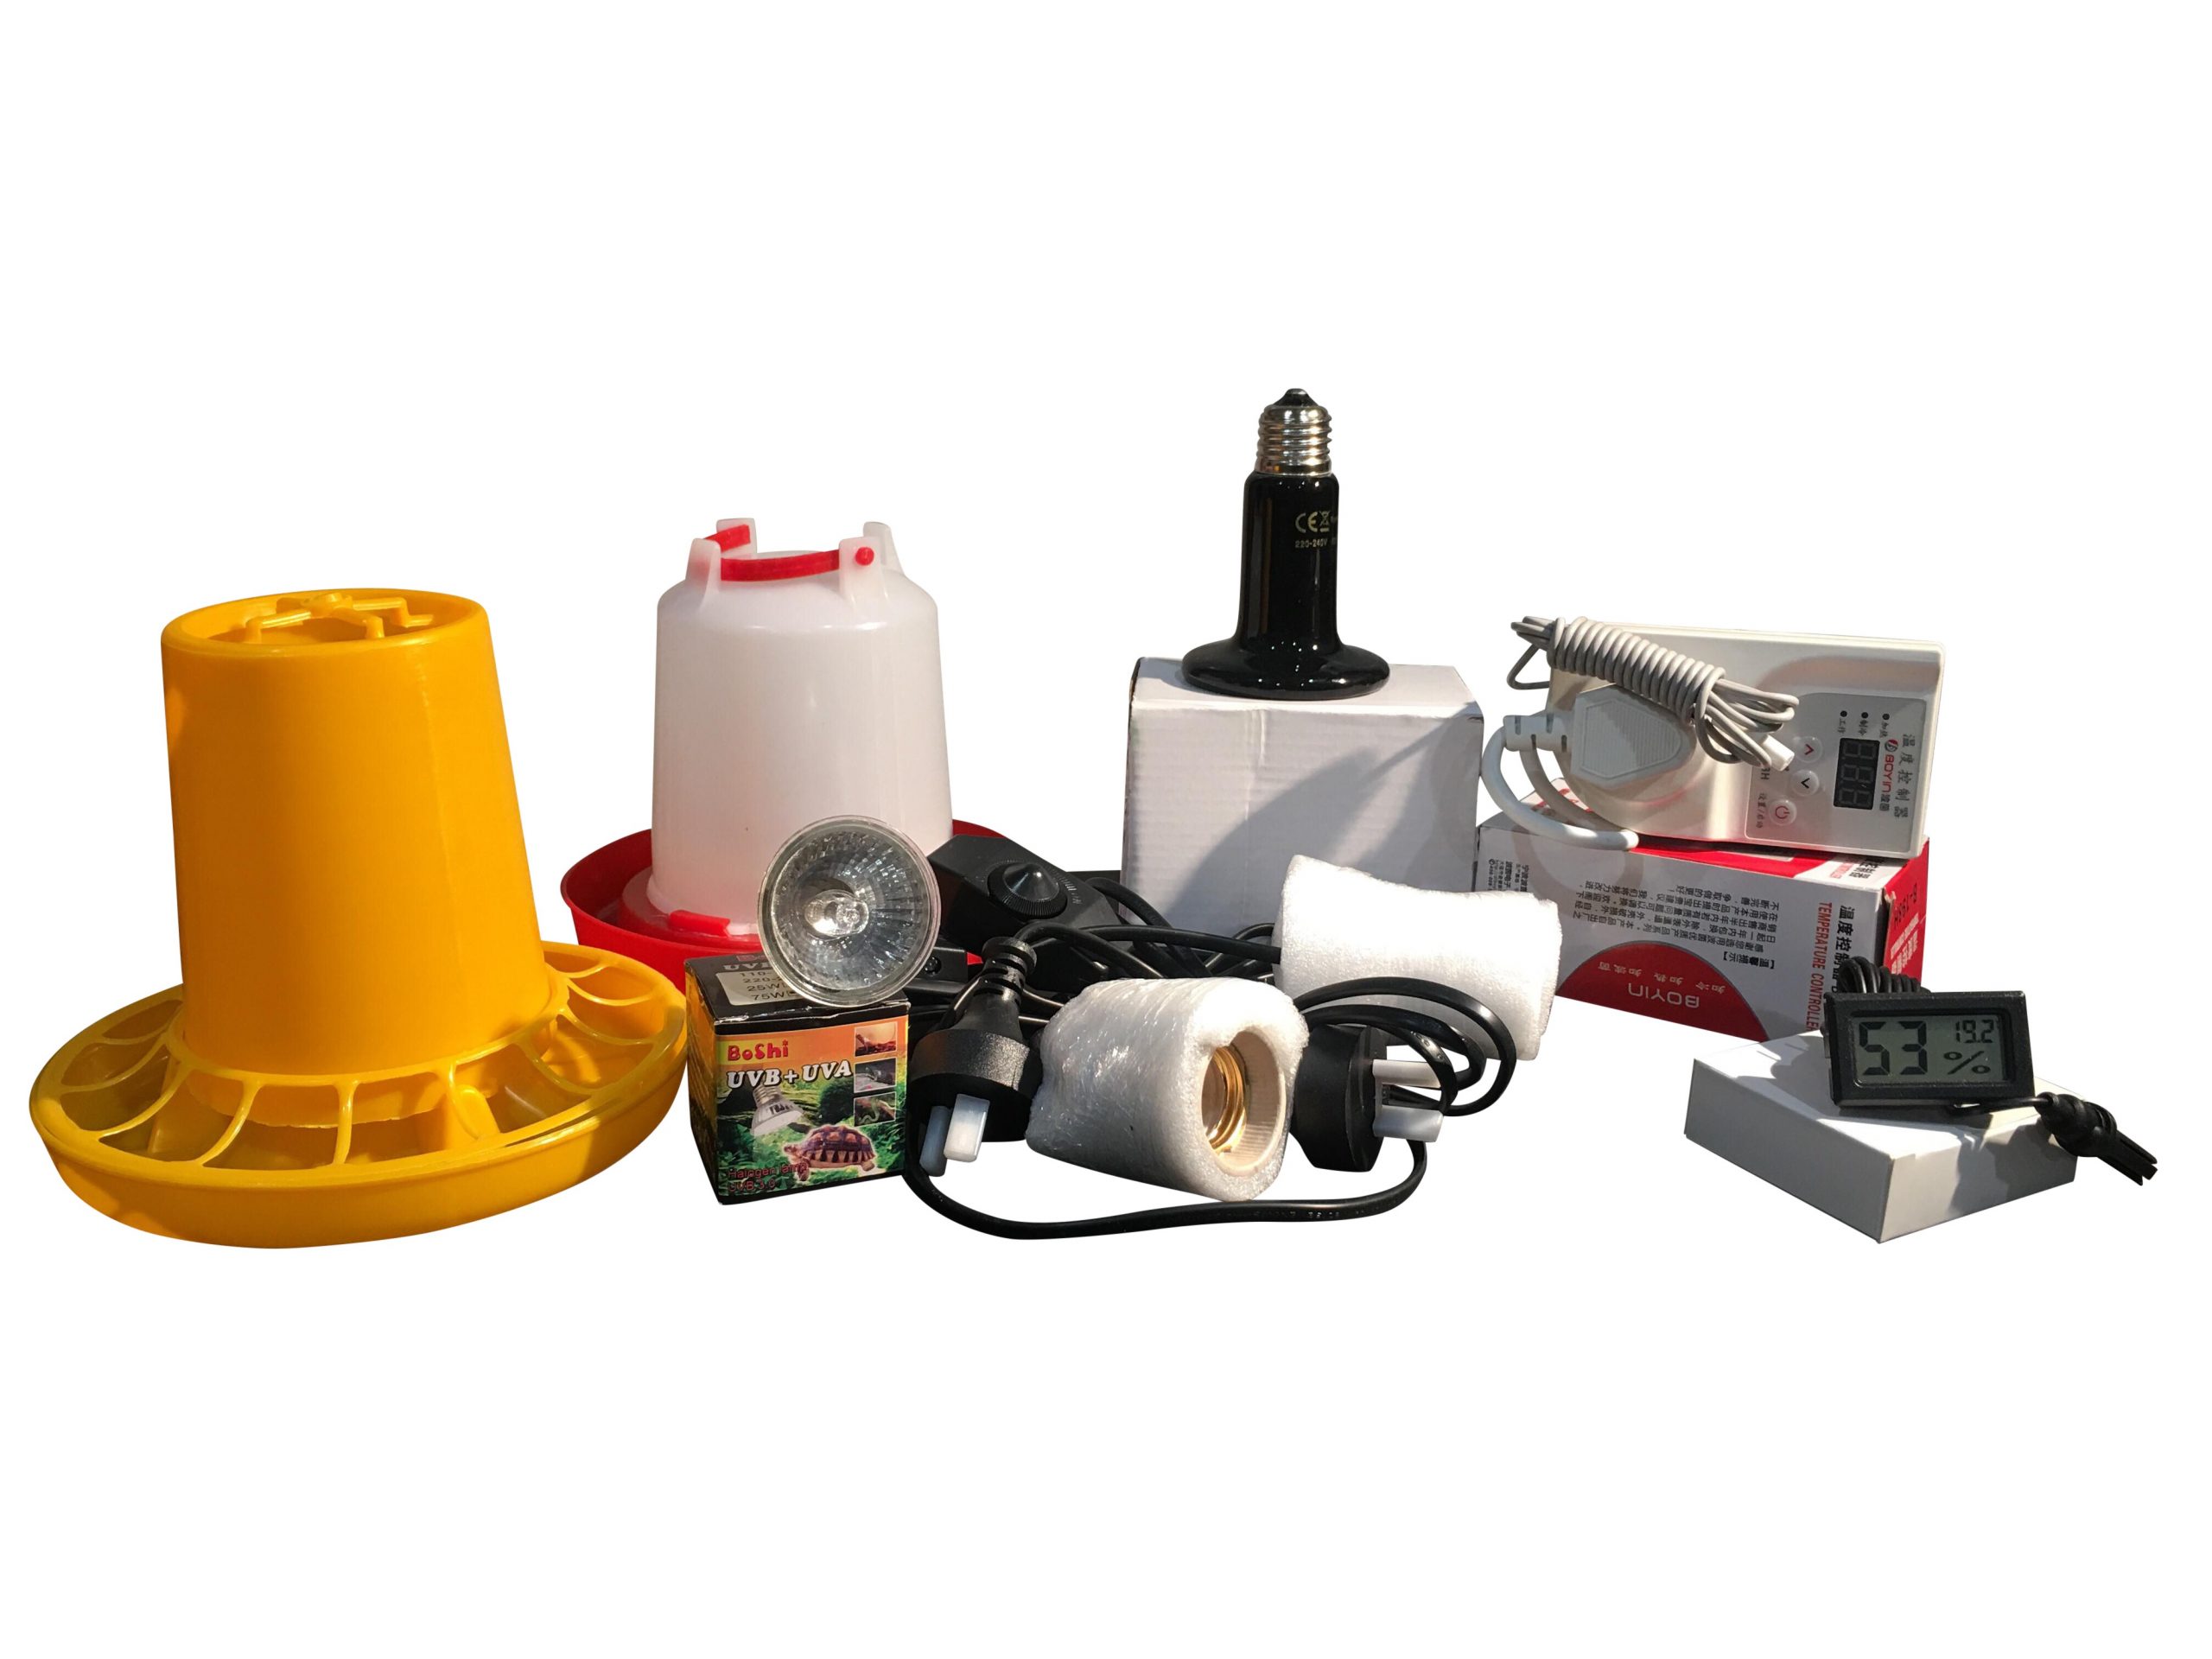
Parts included in the Kit
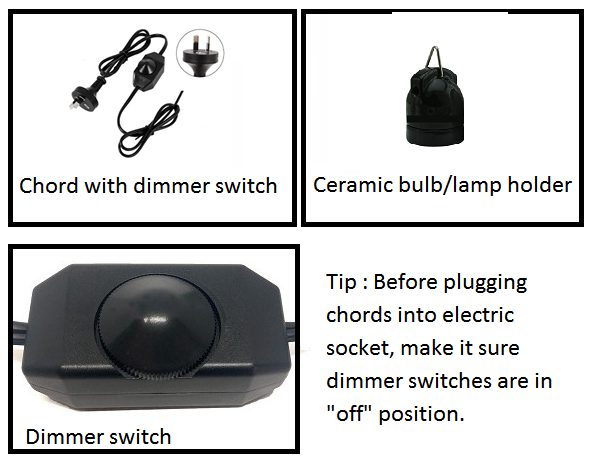
1) Two SAA approved Au plug chords , with dimmer switch and heat resistant ceramic E27 bulb holder.
2) Thermostat: for controlling temperature.
3) 150 watt Ceramic heat lamp.
Thermostat and Ceramic heat lamp work together to make brooder function.
Thermostat is the main part of the brooder as it maintains the temperature. The ceramic heat lamp is major source of heat. In order to make brooder work, “ceramic heat lamp” should be plugged into socket at the back of the thermostat.
Current Temperature and Desired Temperature.
When you plug thermostat into the socket and turn it on. The temperature on display screen is “current temperature” In order to set temperature in brooder, press down the on/off button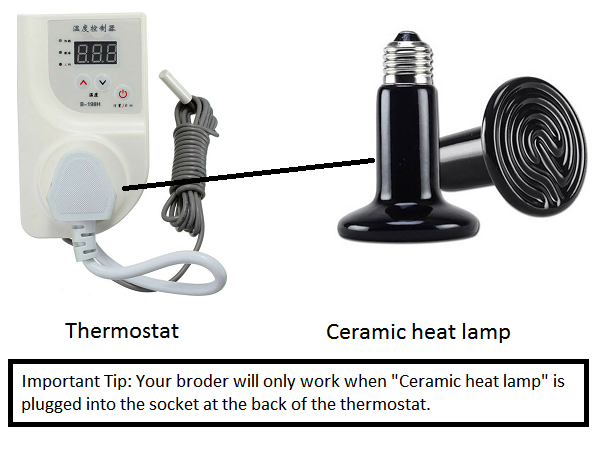
4)Thermometer with temperature and humidity reading.
5) 75 watt UVA+UVB bulb,
6) 1 500 gm feeder.
7) 1 500 ml drinker.
Arrange your brooder as per picture below. Please note this picture is just for reference, you can arrange as you like.
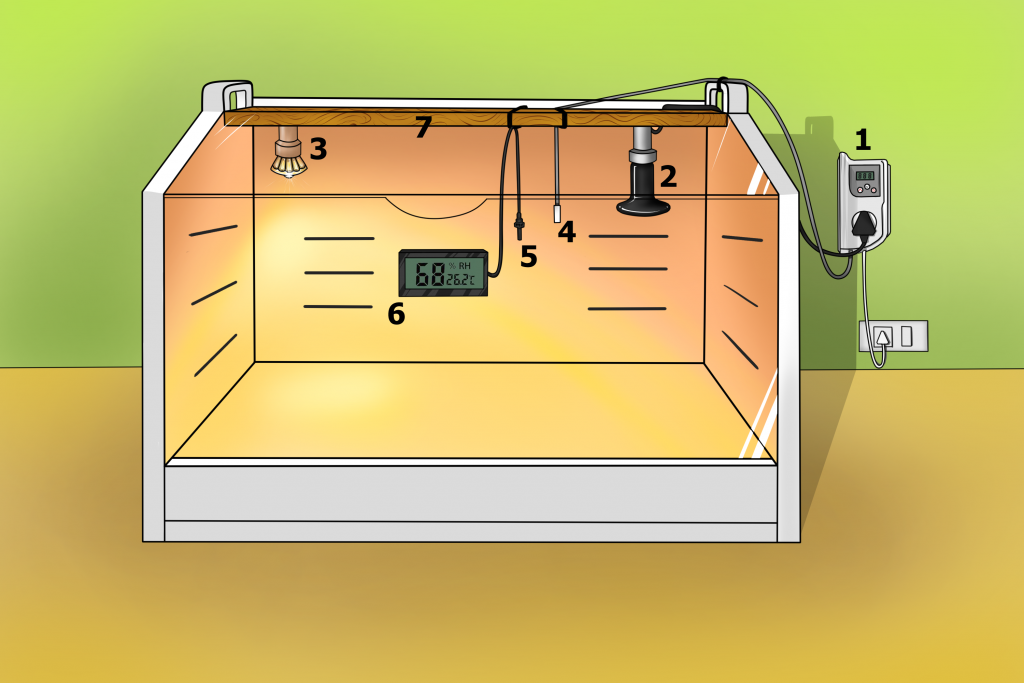
1) Thermostat
2) Heat Lamp
3) UVA+UVB Bulb
4) Thermostat Prob
5) Thermometer Prob
6) Digital thermometer display.